Before going through the technical details lets discuss about the motivation behind why I want to start writing Minecraft mods.
Minecraft is one of the game I continuously go back to play for days move on to someother game, this loop have been repeating from 5 years ![]() .
.
It started with Minecraft PE 0.11.0 and I used to checkout for all the new red stone updates and mess around with them. Lately during quarantine I got time and chance to play with Minecraft 1.16.0. I am trying with different modpacks and shaders and got the idea of building my own mod pack. I am planning to make a series of walkthroughs of my journey of mod development.
In this blog post we are going to cover the environment setup as first step.
My Environment
MacOS Catalina 10.15.6, Minecraft 1.16.1, Eclipse 4.14.0.
These are the following steps the we’ll discuss below:
- Install and setup Java
- Install and configure Minecraft Forge
- Configure IDE environment
1. Install and setup Java
Download and install latest JDK version. I am going with AdoptOpenJDK you can also download from Oracle site.
2. Install and configure Minecraft Forge
Download the Forge MDK (Mod Development Kit) from minecraftforge.
- Unzip the downloaded file and copy
build.gradle,gradlew.bat,gradlew,gradleto a new directory for mod-dev let’s call it/Minecraft-moddev. - Forge explicitly supports development with Eclipse , IntelliJ. As we are going with Eclipse, we have to run the both commands:
$ ./gradlew genEclipseRuns
$ ./gradlew eclipse
in the newly created directory. This will generate the Launch Configurations and download any required assets for the game to run. After this has finished refresh your project. Once you get “BUILD SUCCESSFUL” proceed to next step.
- Append the path to the jdk to your
PATHenvironment variable.
$ export PATH=/path/to/jdk-13.0.1.jdk:$PATH3. Configure IDE environment
Open the eclipse IDE and import the directory we created as a gradle project and run a gradle build.
After that rightclick on the root directory and hover on Run As and select Run configurations. Now you will see a window like this.
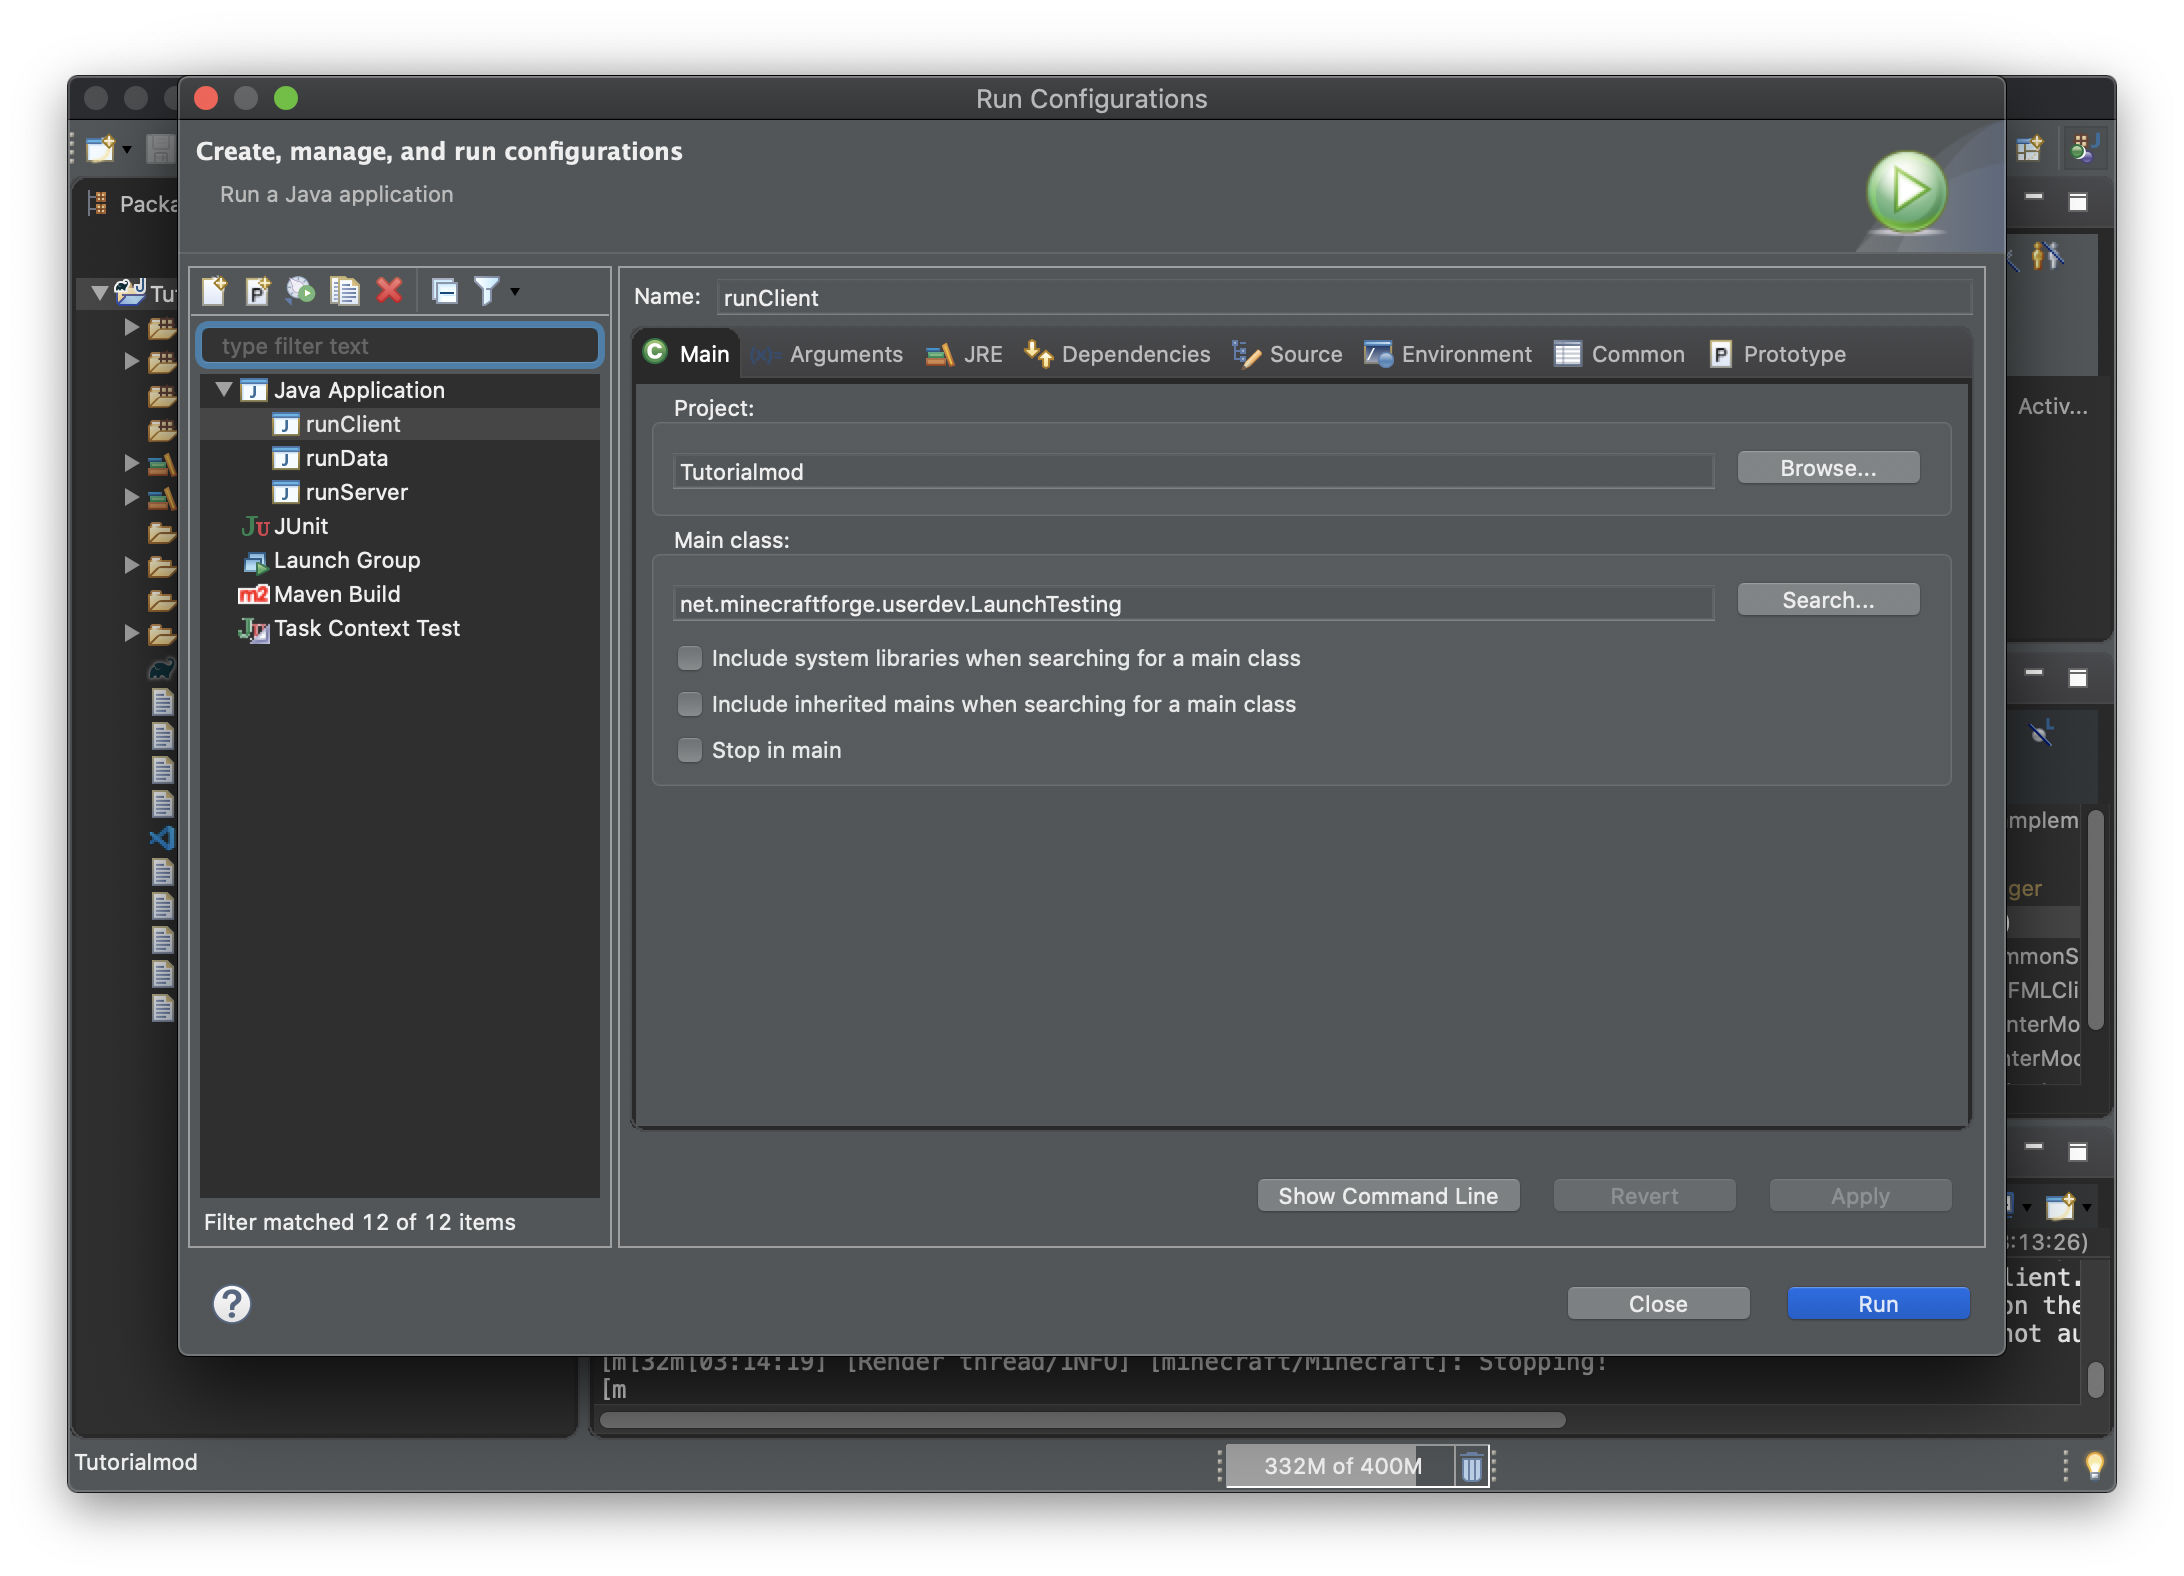
Once this step is done select runClient in Java Application on the left panel and hit Run.
This will launch our client Minecraft application.
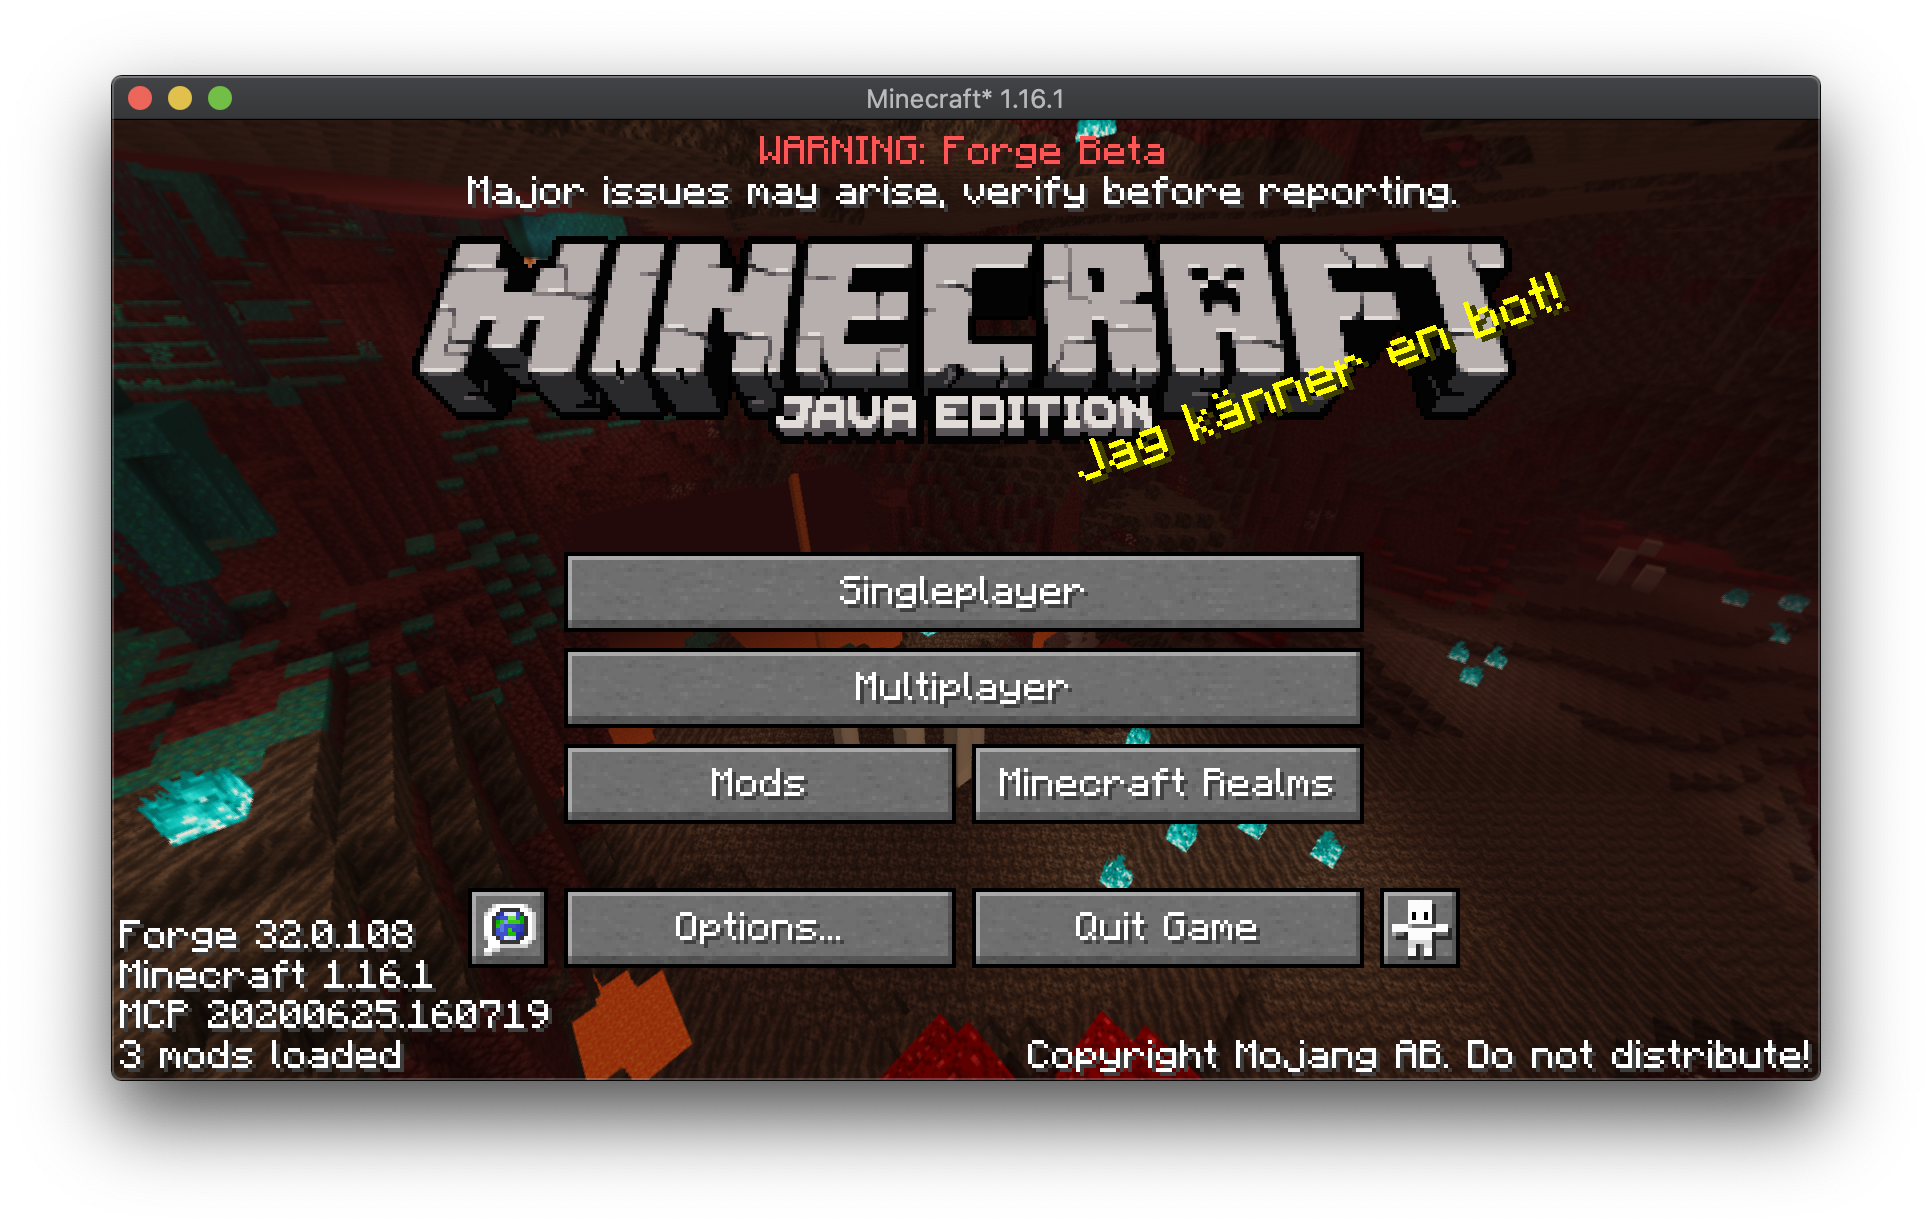
If you get this screen the setup is successful and now we can concentrate on building the mod.